
Welcome to to the New Year and welcome to my very first Blue Fern Studios Post!!!
To kick things off, I would like to tell you a little bit about myself.

My name is Renea Harrison aka Reneabouquets in the virtual world, a Southern Girl, born and raised in Tennessee. I have been married to my husband, David for over 25 years, and we have one son, Draven, who went off to college last year. I am the bookkeeper for our local business and owner of the Reneabouquets.com Store and Reneabouquets Etsy.
I don't just love scrapbooking, I am passionate about it. I love every aspect of this amazing multi-media art. I love the art of the creation itself, from taking the design in my head and getting it out onto paper, to the social aspect of it. I love sharing what I know, and learning what others share.
As a scrapbook artist, I don't really have any one set style. I tend to scrap whatever mood I happen to be in which can range, from Shabby Chic, Girly Girl, Vintage and Girlie Grunge to Masculine, Grunge, and Mixed Media.
As an artist, I think that one of my greatest hopes is that I can inspire you to create and can teach you something new that you can take and use in your own work, so let's get started!!
Boots, Beauty & Blue Fern:
I love sliding into a comfortable pair of boots, and for this Design Team layout, I couldn't help, but get inspired by the Swirly Circle Chipboard Frame to create something rustic meets beautiful!!

I started with a layer of Blue Fern Studios Autumn Anthology-Newsworthy Paper, I then took another piece of the same paper and used the backside, tearing and inking the edges to fit my design. Next, I added a layer of corrugated board that I heavily inked and added my photo to.

I took the Blue Fern Swirly Circle Chipboard Frame, inked it up and then randomly heat embossed it with some Imagine Ink Oatmeal Embossing Powder to get a wonderful, rustic look, and layered it over my photo.
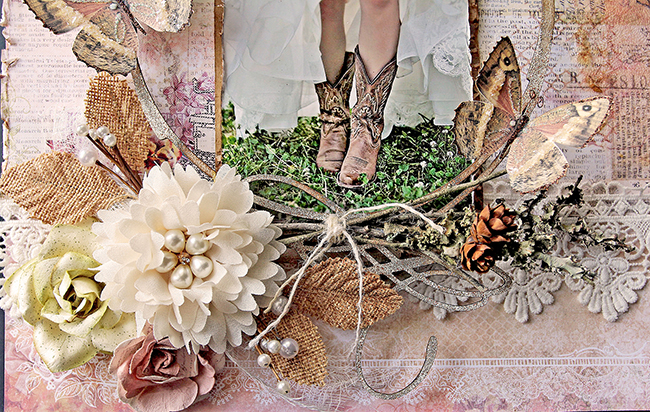
I added some lace to add a feminine touch, and then took some branches with moss, made a little stack and wrapped and tied it with twine, added some mini pine cones and popped some of my handcrafted butterflies.

I added some cheesecloth, burlap leaf picks, a large chiffon flower and some more flowers to round out my feminine meets rustic look.

I then crackle painted some areas around the frame, and inked them, then took a Blue Fern Essential Textures Stamp and did some stamping. Stamping can add a lot of texture and dimension on your layouts and the Essential Textures Stamps are so perfect for adding background noise.

Here is some more detail of the Yumminess of the stamping.

In the top corner of my layout, I inked a "Natural Beauty" chipboard piece from the Blue Fern, All Natural Set. I inked in a way that let some of the natural kraft color of the chipboard show through to get a variegated color effect. I then added some more twigs wrapped with twine and pine cones. I took some of the paper pieces left over from the tearing I did and rolled and inked them, then tied more twine around them. I fussy cut out a little bird from the paper and glitter painted him up and then popped him on with foam tape for dimension.

And here you can see all the dimension and texture that you can create using Blue Fern Products.
Blue Fern Studio Supply List:
Paper:
Autumn Anthology~Newsworthy
Chipboard:
All Natural Set (Natural Beauty)
Swirly Circle
Stamp:
Essential Textures
Imagine Ink Embossing Powder:
Oatmeal
Getting Winterlicious With The Blue Fern Sketch:
Each month Blue Fern Studios has a sketch challenge that you can take part in. Here is this month's January Sketch:

And here is my Design Team take on the sketch:

I decided to work with some papers from the Blue Fern Deja Vu line to get a Winterlicious, frosty look!! I started with a piece of Lustre Paper and then used another piece of the same paper, this time using the backside. I distressed the edges heavily and did some grunge punching. I used a stencil and texture paste to create the snowflakes on the background paper, and I then added in 2 more layers of Tresors paper, adding sand paste and Glitter Glass to create a Snowy~frosty look.

Next, I took a Blue Fern Chipboard French Ironwork, painted it with crackle paint and then clear emboss inked randomly and heat embossed using the Imagine Ink Mystic Plum Embossing Powder, and added a crystal for a little bling.

The snowflakes were created by taking Blue Fern Chipboard Winter Flakes, painting them with white gesso, and then heat embossing them with Imagine Ink Icicle Embossing Powder.

To add a little more texture and bling, I then added Silver Microbeads to the tips of the flakes and overlaid them with Snowflake Buttons.

I created a flower layer at the bottom corner of my photo.

I also popped on some of my handcrafted butterflies for some extra sparkle!!

I love that Blue Fern papers are so high quality and thick that they can handle all of my mediums, textures and layering! Just look at all the dimension that they allow you to achieve.
Blue Fern Studio Supply List:
Paper:
Deja Vu-Lustre
Deja Vu-Tresors
Deja Vu-Tresors
Chipboard:
French Ironwork
Winter Flakes
Imagine Ink Embossing Powder:
Mystic Plum
Icicle
I love creating off the page projects, and one of my FAV things is mini albums. I love creating pages that have little tuck ins for storing memories, and all kinds of unexpected treasures!!

For this mini album, I used the Blue Fern Frolic Paper Collection, starting with a layer of Friendship as the base layer and then adding a layer of Petits Moments.

I then added a layer of corrugated board that I added some beads, Imagine Ink Embossing Powder In Cerulean and cheesecloth to grunge it up a bit. I took some pieces of the Blue Fern Shabby Brick Pieces Chipboard, textured them and added them to my cover design.

Next, I fussy cut out one of the birds from the Friendship Paper and glitter painted him up, then cut out the rest of the bird design and added it to a Blue Fern Majestic Chipboard Frame.
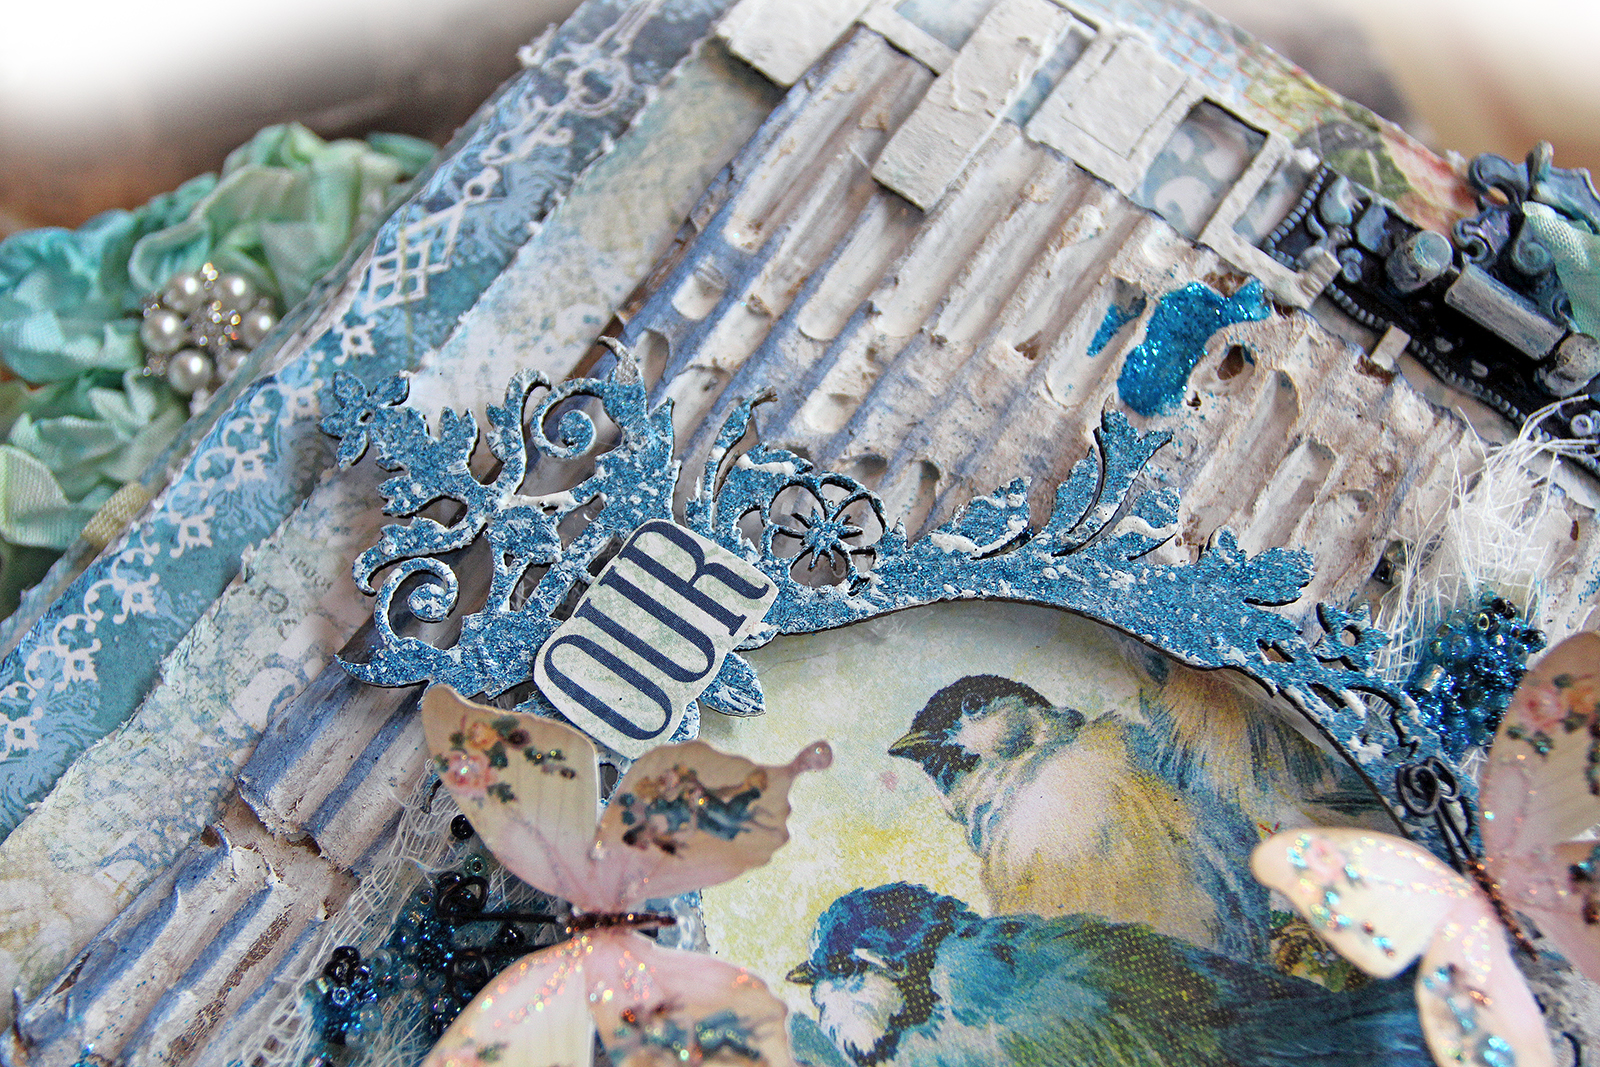
I painted the frame with a coat of gesso and then heat embossed it with the Cerulean Embossing Powder.

Here is a look at all the layering.

Here I created pocket pages with tags using the following Blue Fern Papers:
Frolic Petits MomentsFrolic Veranda


For these pages, I used:
Frolic Friendship and Frolic Petits Moments Papers
there is a pocket that I created using a cut out of the birds design and then created,

a sweet, little sewn booklet from the Calling Cards Paper,

and a tag that tucks in at the top from the Dans Le Jardin paper.

These pocket pages were created with the Frolic Adorn Paper.

And all the tuck in and tags were created with the Frolic Calling Card Paper.

The last set of pages were created with the Frolic Dans Le Jardin Papers and feature a pocket,

With Frolic Calling Card tags as well as a large tag, tuck in created with Frolic Friendship Paper.

The back side was created using Frolic Friendship Paper.
Thank you so much for joining me for my first Blue Fern Studios Reveal! I hope that you have enjoyed getting to know a little bit about me and also that you have enjoyed my projects. Here is to a New Year full of Creativity, Inspiration and Fun!! Hugs ~Renea
Blue Fern Studio Supply List:
Paper:
Frolic Friendship
Frolic Calling Cards
Frolic Dans Le Jardin
Frolic Petits Moments
Frolic Veranda
Frolic Adorn
Frolic Calling Cards
Frolic Dans Le Jardin
Frolic Petits Moments
Frolic Veranda
Frolic Adorn
Chipboard:
Majestic Frame
Shabby Brick Pieces
Imagine Ink Embossing Powder:
Cerulean


