Sunday, August 24, 2014

Summertime Layouts

Hello !

Today I have for you 3 layouts to the end of summer.  We still have some sunshine days but they become much shorter and I see falling leafs - signs of incoming Autumn. So I'm making some works to keep summer for longer :)

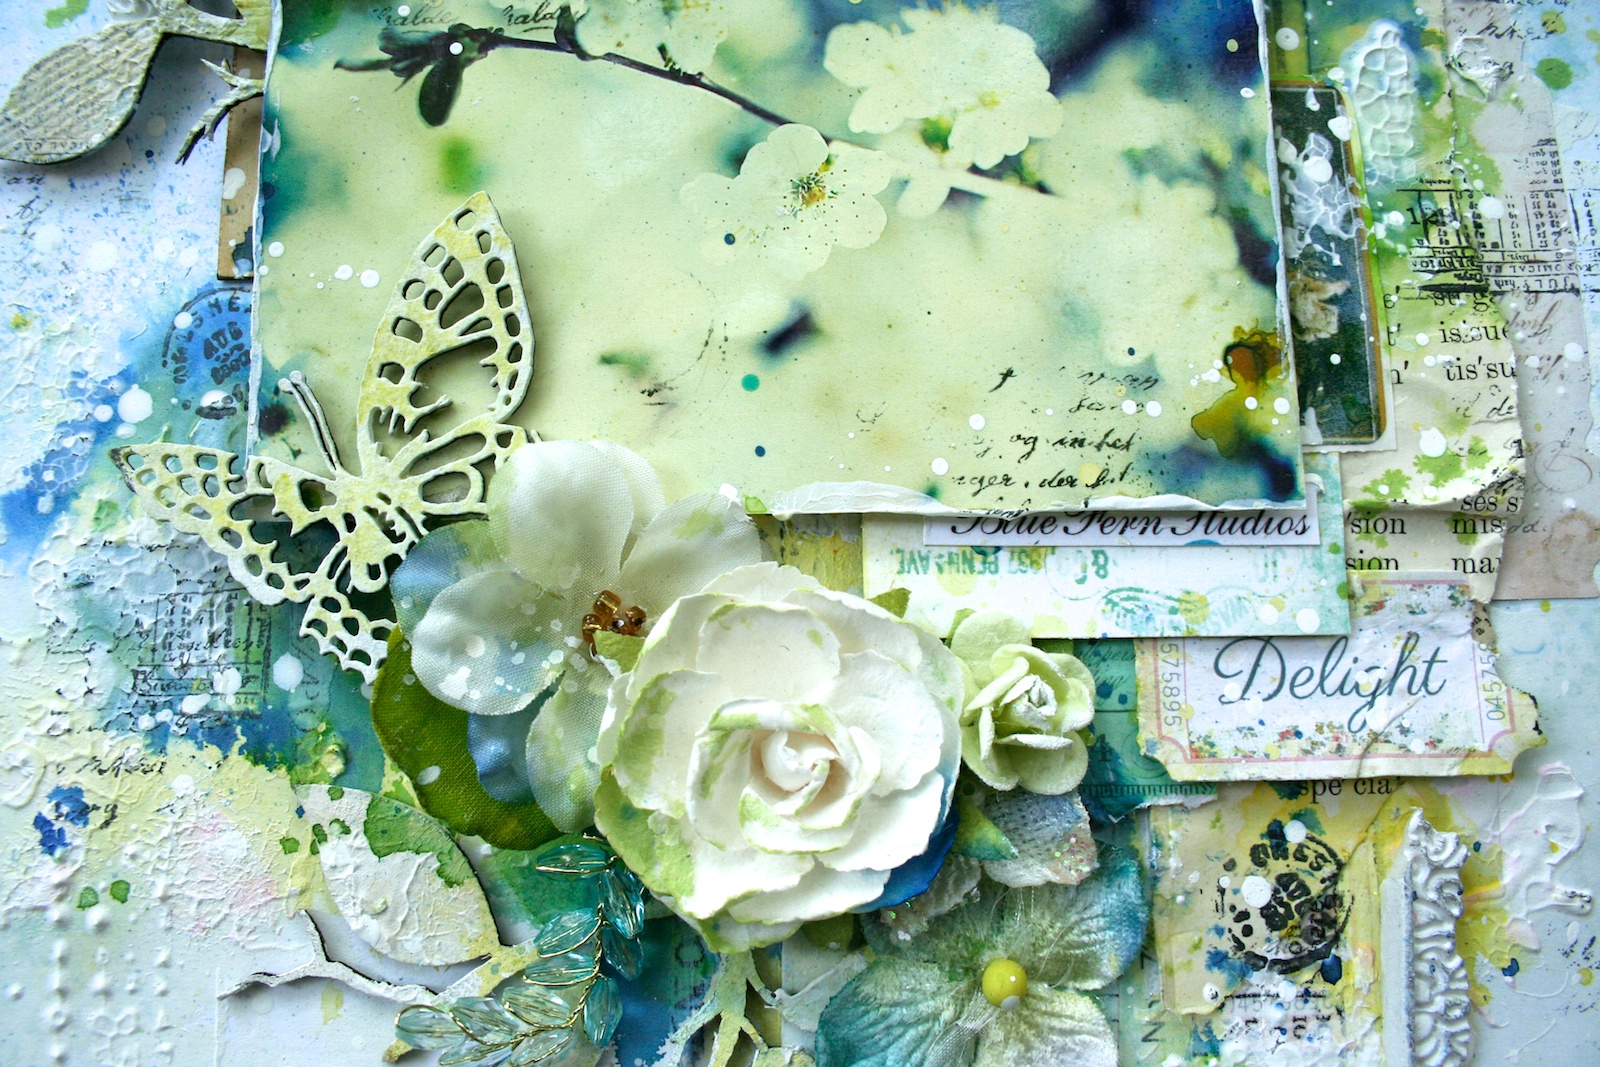
                        First work Is with my' son. I made this photo during one of our trips.  I use bits of ups and downs panel and scraps of different blue fern Papers to create background. . I really love this one. I mean I'm totally in love in panels from BFS at all they are so universal and give you so many ways of use  but this one I really like . My next video for BFS will be with this one ! . Mini number gird is base of composition . I used also piece of mini ring panel and chunky words as title of my work. The main paper in this work is Timeless from Blue fern Garden collection with scraps and leftovers from Ombre dreams :)


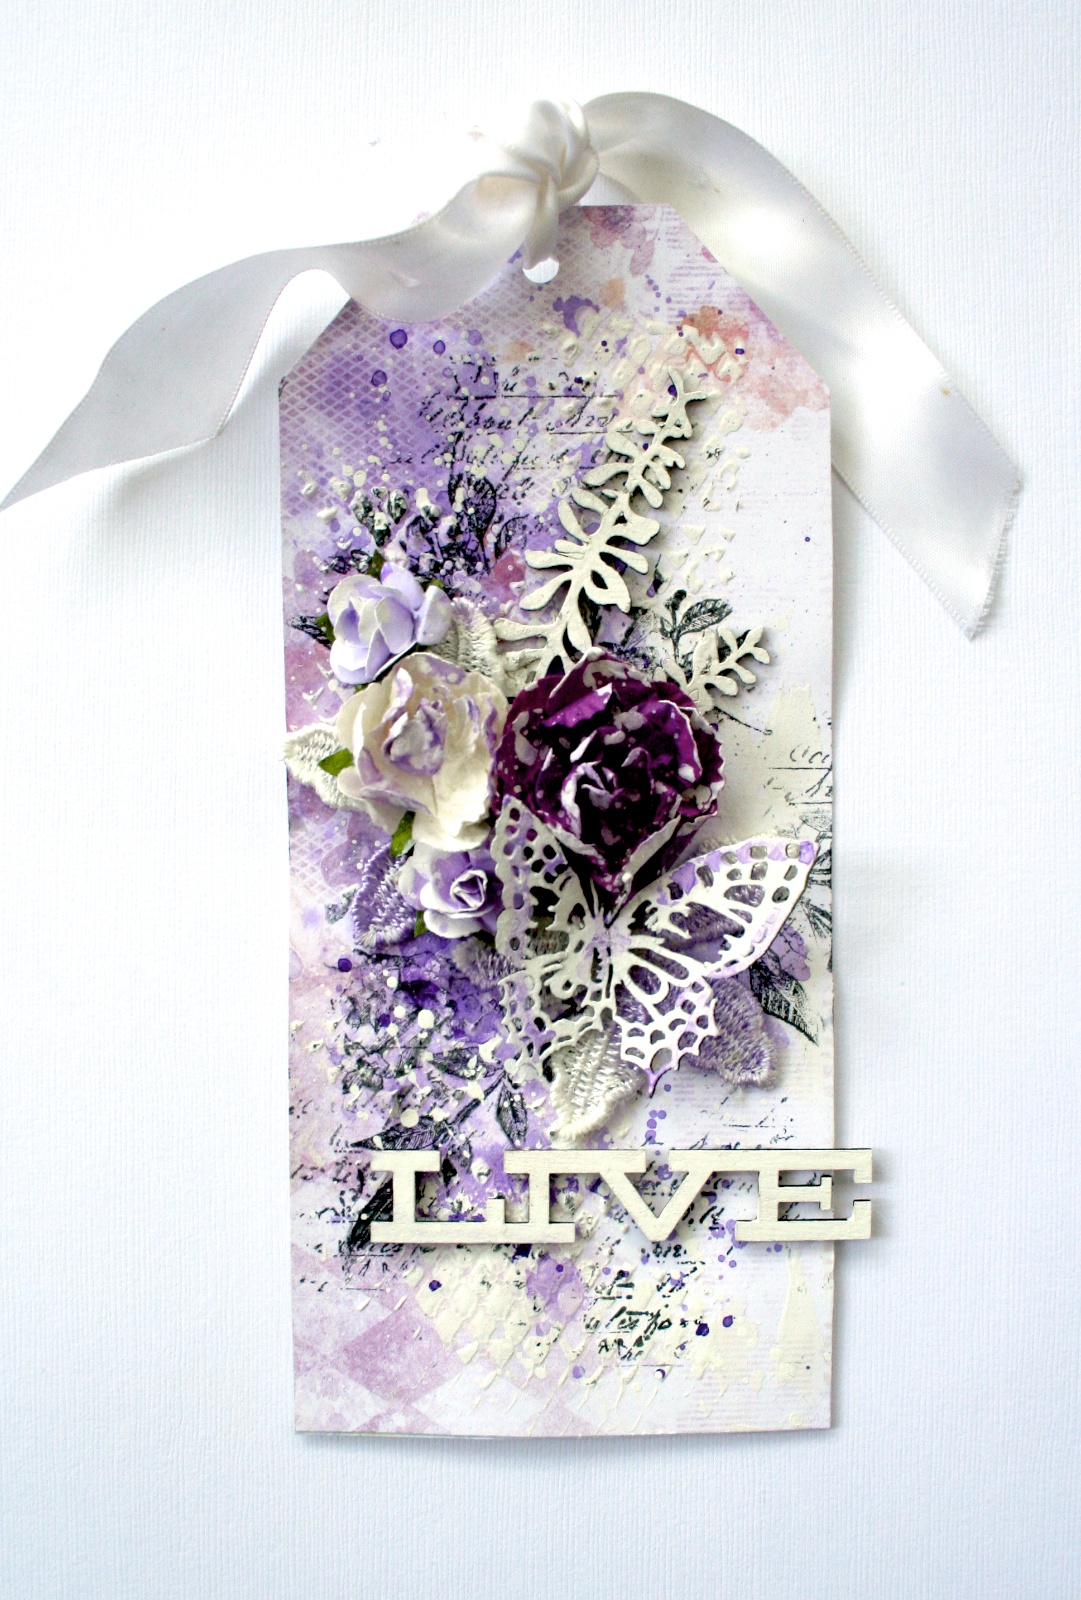
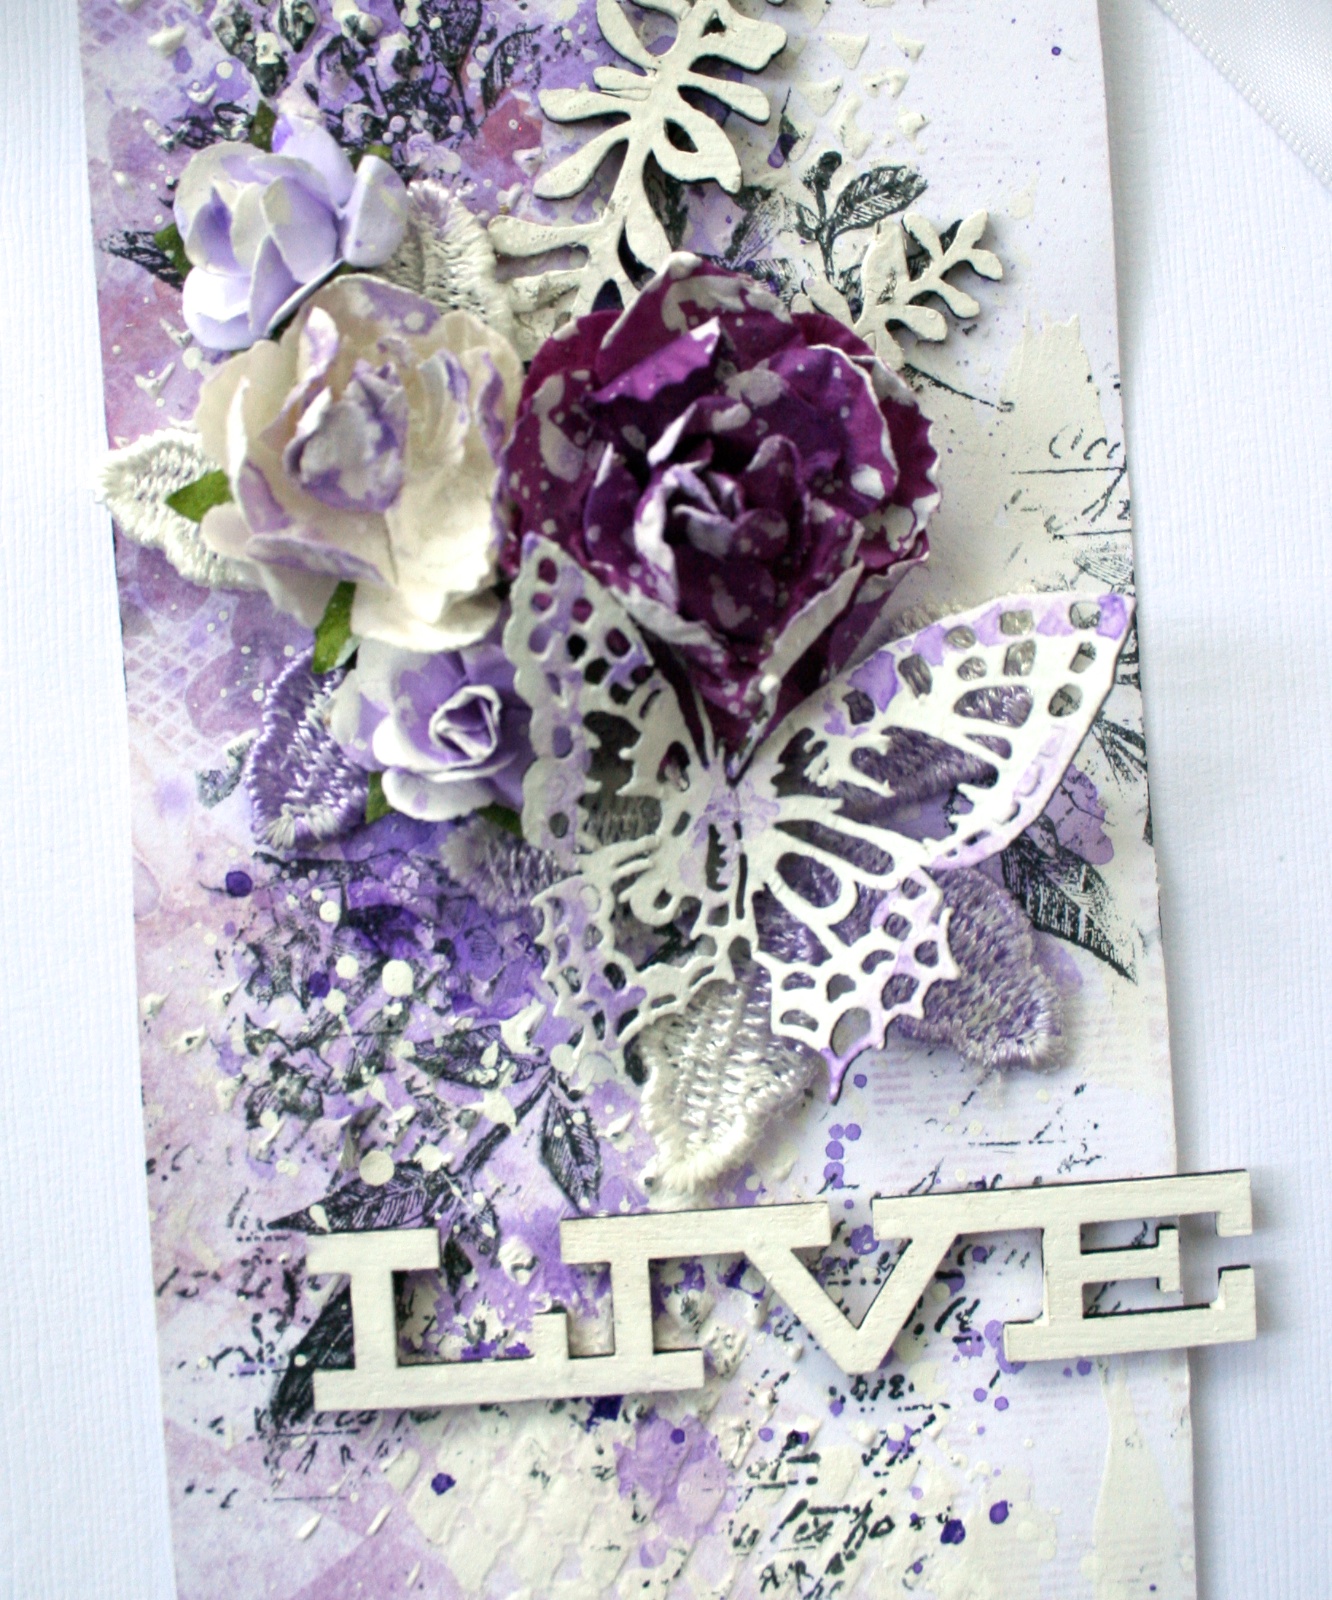
This LO i made with photo of me and my mummy. It was made during her visit , we where sightseeing city and making selfies like crazy :) It was fun ! . I use my absolutely favorite papers - Ombre dreams and delicate feminal chipies wild field steam and Eastern Lantern and as the title Charmed page dandles.


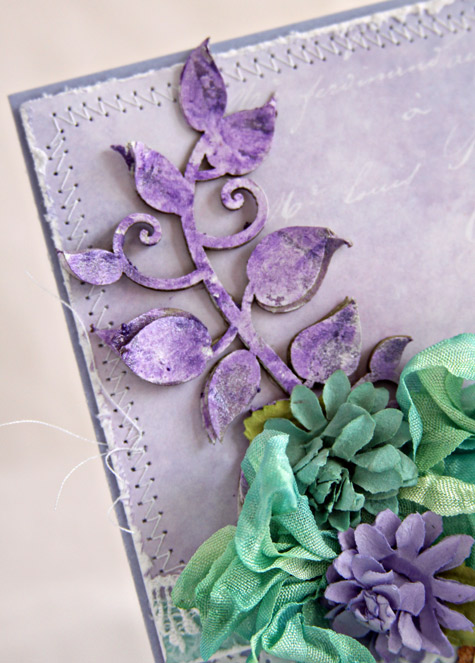
And one more with my son. This photo was one of first photos I made after moving. On our first trip to know the city . To frame it I use Grunge Shooting stars as a Title I use Arrow words, and Backyard Boy title ( I cut backyard part and save it for another work ) . Base of my project is Susan's Dream I use gesso to light it up little bit .

Saturday, August 23, 2014

Video Education: A 3 Dimensional Layout with Adrienne Ford

Hi There! Adrienne here, stopping in to share my latest video Butterfly Fly. I wanted to share with you specifically how you can give some SERIOUS dimension to your Blue Fern Chipboard. Be sure to subscribe to Blue Fern Studio's You Tube Channel so you get all the latest on products, education etc! 

Here is my layout that I did for this...
I wanted to go for a really whimsical piece and create 3 Dimensional Butterfly wings for this special girl of mine! 

 Blue Fern Products:

Bits of Honey
Corner Flourishes (2)
Ombre Dreams: Shannon's Dream


And here is my video.....


I hope you enjoy!

Until Next Time,
Adrienne


Friday, August 22, 2014

'Delight' by Lisa Griffith

Hello Blue Fern Studios friends! 

I hope you are all having a wonderful week so far....it's my turn to share my projects with you today.
My first project is a layout called.....

'Delight'


Some of my all-time favorite designs are the nature inspired sprigs and leaves like the 'Spring Branch' I used here. I also used a piece of the 'Tattered Butterflies' (another favorite!). I painted them white and then splashed them with some of the yellow and green watercolor paints that I used on my layout.

Here are a few close ups....


I used a piece of the beautiful paper called 'Susan's Dream' for my base paper with lots of 
layers and masking.


My second project is a tag I created using a piece of 'Shannon's Dream'.


I started by using a mask with heavy gesso, added a piece of the 'Layering Stems', and then added some purple ink and some stamping in the background. Then I layered on some flowers and another piece of 'Tattered Butterflies'.


Thanks for looking!
Until next time,
Lisa xo

Thursday, August 21, 2014

{Cards} with Patter

Hello! Patter here with you today. I wanted to share two cards with you that have the same design concept but look very different. Both cards use the Ombre Dreams paper line and the Leafy Bough chipboard. Both also use a doily, stitching, lace, and flair for the sentiment. Let's look at today's card inspiration.

Hello There
For this card, I used a portion of the Leafy Bough chipboard. I also left the branding strip on at the bottom of the patterned paper. It has a lace design on it which gave me the idea to add real lace to that portion of the card, and it also brought in a second color to the card.
To distress the chipboard, I misted it with water to peel up the leaves into more layers. I then painted the chipboard with gelatos.
Blue Fern Studios products used:
Ombre Dreams paper (Charlotte's Dream and Joyce's Dream)
Leafy Bough chipboard

Hello
This card is a 4 1/4 x 4 1/4 square card. I used the left-over piece of the Leafy Bough chipboard from above.
I also treated the chipboard in the same way that I did with the above card. I did color it with different colored gelatos however.
Blue Fern Studios products used:
Ombre Dreams paper (Shannon's Dream)
Leafy Bough chipboard

Missing You
This is the card I created for the Blue Fern Studios August Sketch Challenge. I only used a portion of the sketch to create this card. I used the Blue Fern Winter Page Dangles chipboard and cut off the top portion of the chipboard to add the detail to the upper left corner of the card too.
Blue Fern Studios products used:
Ombre Dreams paper (Ginger's Dream)
Winter Page Dangles

Thanks for stopping by. I hope you will join in on the sketch challenge and also make some cards with your Blue Fern Studios products. Blessings,

Wednesday, August 20, 2014

Two Layouts and a Card with Rae

Hello, everyone! It's Rae with you today to share some projects I've made this month.

"Wonder" Card


For this card, I used a couple of sheets of paper of the Blue Fern Garden line, Parlour and Timeless. I used a light brown distress ink to give it the aged look.

In this closeup, you can see the four pieces of chipboard I used, each treated in a different way.
 The bird is from the "Little Birds" set is simply colored with brown archival ink. The title, "Wonder" from "Winter Titles" set was primed with white paint, then I randomly placed light blue embossing powder so some of the white would show through, then I lightly covered the whole piece with a light brown distress ink. The foliage peeking out under the flowers are remnants I had form some "Layering Stems" that painted white and lightly misted with an olive green mist.

For the "Majestic Frame," I covered the whole piece with an embossing medium and sprinkled brown, gold, and blue embossing powders. I repeated the process three times to get nice coverage.

"Cherish" Layout


For this layout, I used papers from the Ombre Dreams collection, along with some green cardstock.

I used the "Blue Fern Frame" for the focus of my design. I treated this piece by spraying it with a brown mist, letting it dry, then tracing the details with dimensional paint to create a look somewhat reminiscent of a gilded metal look. I finished the look by spraying the whole piece again with the brown spray to get into the little crevices of the dimensional paint.


I used green dimensional paint and poured purple and coral embossing powders over the entire "Cherish" piece while the paint was still wet. Then, I used a heat tool, and overdid it so the paint would bubble up for this dimensional distressed look.


"Key to my Heart" Layout

I used papers from both the Blue Fern Garden and Ombre Dreams collections, picking out light blue and light brown tones, along with some cardstock.


In this closeup, you can see the paper that I stamped with a script stamp to alter the look of it.


I treated all of the pieces with gesso.  On the "Ket to my Heart" title and key, I used two shades of brown distress ink.

On the "Large Roman Clock Set" I used various distress and chalk inks.

For the "Wild Flourish Bundle" I sprayed it with an ivy mist to create drops, then used more light brown distress ink.

I hope you enjoyed seeing my projects today. Thanks for stopping by!


Rae

Tuesday, August 19, 2014

Video Education: With Kelly!

Hi there! Kelly here today...with my very first video as a member of the Video Education Team.
I am excited to share my layout process with you and hope you will enjoy watching it.
Be sure to subscribe to our YouTube Channel so you don't miss out what our team has to share!

Here is my layout...
"Dreams Come True"
I used the Ombre Dreams paper collection, along with the Roman Clock Set - Small.

A few close ups..


And here you can watch, start to finish how I created it!


Thanks for watching!! Have a great day!!

Kelly

Monday, August 18, 2014

Mixed Media Layout Inspiration by Keren Tamir


Keren here and its my turn again on the Blue Fern Studios blog. I have 3 Mixed Media Layouts for you today.

Hope they inspire you!!


"You Are My Happiness"

This is the first layout I created using the Ombré Dreams Ginger's Dream Paper as a background.


I used the Wild Flourish Frame to frame my photo. I altered it by adding texture over it using textured paste and a patterned Stencil. Then I sprayed it with two different Color Bloom Sprays: Sorbet, Vintage Coal and Lime Wedge


I added the same texture and colours to the background and then stamped some branches and birds using black archival ink.


Finally I added some matching flowers, a title using the word Happiness from the Good Vibes set  and Voila!! 


<<<<<<<<<<<>>>>>>>>>>>


"You are perfect just as you are"

This is my second creation this month for Blue Fern Studios

I created a mixed media layout using the Ombre Dreams Chalotte's Dream paper as the background.


I wanted to hide the purple side of the paper as much as I could because I wanted to create a masculine layout. First I primed the purple side of the paper with clear gesso. Then, I created lots of texture in the background using a Stone Wall  stencil and some Textured paste. Finally, I sprayed it with two  Color Bloom Sprays: Cobalt and Precious Stone. I let the spray drip down the page to cover as much of the purple as possible.


I cut the Ups and Down panel Blue Fern Studio Chipboard. I cut it unevenly to create movement on the page. Then I embossed it with white and black embossing powder. Finally I inked the edges with black coal fluid chalk ink.


I built some layers over the chipboard panel and added some matching flowers and embellishments around the photo.


Finally I added a title in the corner using the Perfect chipboard word from the Chunky Word Set. I also embossed it with black embossing powder.
I also added some journaling along the side of the page using both sticker words and my own writing.


<<<<<<<<<<<<>>>>>>>>>

"I Love You"

This was my layout created for the new sketch challenge this month. The August's sketch was amazing as always.
We hope you get to play with us!!!


I love it when my kids pose together for me and on that rare occasion I snap the camera to get this cute picture of them. I used it as the centre of my layout.


I used the Blue Fern Studios Ombre Dreams Collection, Flutterbird chipboard dangles, a small camera from the picture perfect chipboard set and the word Love from the good vibes chipboard set.


Well that's all for today!!
Hope you enjoyed my creations

Have a wonderful day!!

Keren